English
Zip lines provide riders a feeling of freedom and adventure unlike many other thrill rides; riders enjoy unhindered movement through the air, wind rushing past, and views usually reserved for the birds. The best zip line experience is smooth, easy, and safe for the riders while also being automatic, fast, and reliable for staff. The zipSTOP zip line brake was made to create the best experiences for riders and to improve zip line operations. The zipSTOP slows your zip line riders gradually, comfortably, and reliably using self-regulated magnetic braking technology.
Before anyone can experience the ride, the zip line itself has to be designed, installed, and thoroughly tested. This includes the most necessary part of a zip line: the braking experience. This is where riders often feel anxiety about what they have to do, how fast they will be coming in, and how jarring the stop will potentially be. Correct installations of the zipSTOP can make it an easy, automatic, and enjoyable experience. And while we can't replace the expert knowledge of zip line builders or engineers in a single post, we will cover some basics of zipSTOP installations to help get you started.
Speed
This is the whole reason we want to zip line in the first place, isn't it? To fly through the air with the wind in our face? Many riders want faster speeds, but that speed is then the enemy of a safe and comfortable stop at the end of the ride. So how do you give a fast ride and then gradually and comfortably stop your riders? The zipSTOP provides multiple options.
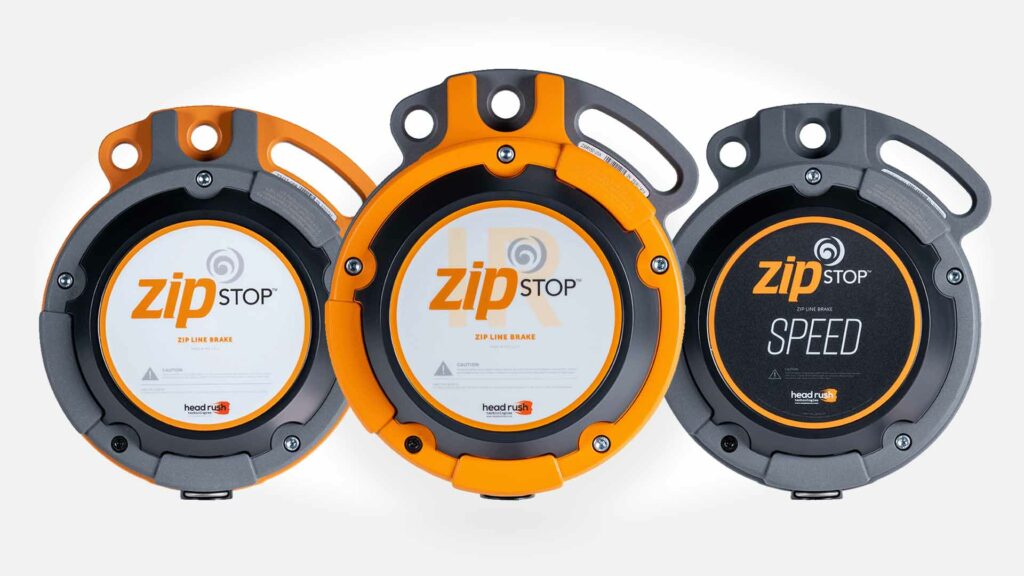
First of all, there are two zipSTOP models to choose from. The zipSTOP can accommodate arrival speeds up to 24 km/h (15 mph) with the use of reduction lines. The zipSTOP IR is a streamlined version that can accommodate speeds up to 60 km/h (37 mph) without an external reduction line, making installation and upkeep easy.
A rider's arrival speed is a function of zip line slope, rider size and weight, wind speed and direction, and rider trolley rolling resistance; each zip line installation will be unique because of these many changing variables. Determining the range of rider arrival speed is key to calculating the braking distances for the zipSTOP brake system. The braking distances will then allow you to build a platform and retrieval system that provides the most enjoyable experience for riders.
Braking Distance
To calculate the braking distance of a zipSTOP brake system you will need to know the rider weight range anticipated for your zip line, the arrival speed range, and the reduction line ratio used for the zipSTOP setup. (We'll address details of reduction lines later on.) A helpful worksheet and some handy braking distance charts are available in the zipSTOP manual to estimate minimum and maximum braking distances. Of course these are just estimates and unmanned testing should always be conducted to determine actual braking distances.
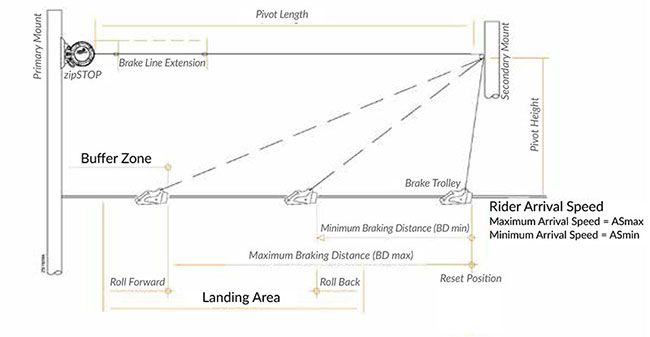
By calculating these distances, you can then build a safe landing area for your participants. The landing area should be large enough to accommodate the minimum and maximum braking distances, but some retrieval for lighter participants should be anticipated and planned for. The end of your platform or any objects which riders may come in contact with should not fall at the maximum braking distance point. A buffer zone is required beyond maximum braking distance, and should also include the distance required for an emergency arrest device (EAD) to activate. An example can be seen in the image below.
The zipSTOP manual also includes braking distance charts that relate maximum and minimum arrival speed to a rider's weight to then estimate braking distances. The key item on these charts is the “BDmin Line." If riders fall below this line because they are too light in weight or are arriving too fast, they will brake too fast once they contact the brake trolley. The force would be uncomfortable at best and could result in injury at worst. Always check that your zip line installation to make sure riders will not fall below this line!
Reduction Lines
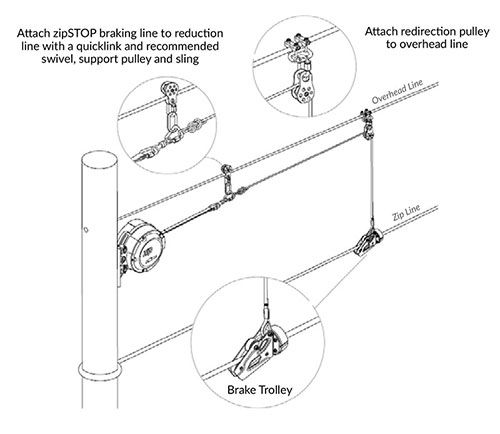
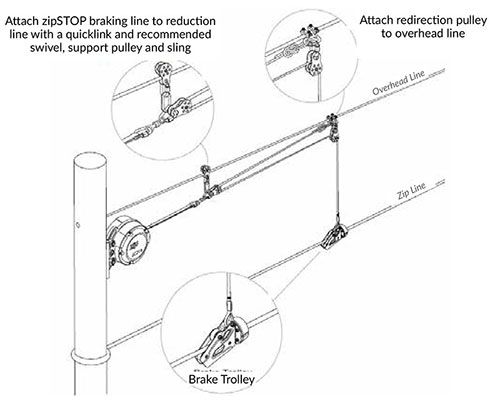
Reduction lines can be used to adapt the braking system, and we recommend either a 1:1 ratio (for use with the zipSTOP and zipSTOP IR) or a 2:1 ratio (for use with the zipSTOP only, not acceptable for the zipSTOP IR). With a 1:1 ratio, the brake trolley is connected to the zipSTOP by a single redirection line and pulley. This setup is suitable for low speeds because it provides the strongest braking force and shortest braking distance. Because riders will feel the braking forces the most on a 1:1 system, the maximum approach speeds are lower than other setups.
With a 2:1 ratio, an additional pulley is added to the system. This means that for every two feet the brake trolley moves, the zipSTOP braking line will only extend one foot. A 2:1 ratio can be used for zip lines with higher speeds than a 1:1 and will provide a softer braking experience. This ratio will also result in a longer braking distance, though, and should be taken into consideration with your zip line design and platform design.
More detailed information on possible system configurations (including 3:1 ratio and offset reduction lines) are included in the zipSTOP manual or contact your zipSTOP distributor for information.
Rider Orientation
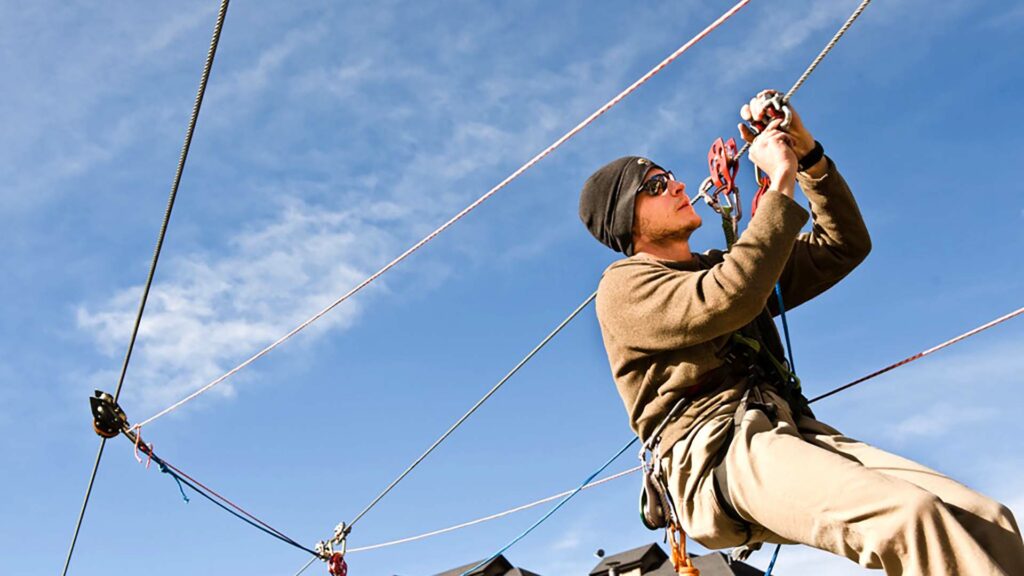
While the feeling of freely speeding down a zip line is exhilarating, many riders still want to feel some level of control over their experience. The easiest way to do this is to provide them control over their orientation on the way down. This lets them enjoy the view in whichever direction they like, wave to friends on parallel lines, and to keep themselves facing forward when they enter the braking area. This last point is especially important if using impact braking for your zip line.
To solve this problem and more, we created the Head Rush Impact Trolley. This trolley offers the smoothest ride on the cable, reduces cable wear, and is one of the longest lasting trolleys on the market. With the t-handle added on, the Impact Trolley offers the best rider experience by allowing them to feel in control during the ride and to maintain a safe, forward facing position as they enter the zip line's braking zone. So many solutions in one little package.
Each zip line installation is unique with many factors that come into play when considering the user's experience. Reference the manual or seek professional advice if you have questions. We also have a video below that describes basic zipSTOP zip line brake installations, provides great visuals on the 1:1 and 2:1 ratio configurations, and more. If you want a highly technical and in depth explanation, you can settle in with a cup of coffee for this hour and fifteen minute discussion of advanced zipSTOP installations.
Be a responsible zip line owner and follow proper installation directions, seeking professional advice if required. Also, always conduct unmanned testing of your zip line installation instead of using human guides or staff as the test subjects. Safety first, everyone! Then you can enjoy the ride worry free and give your visitors the best zip line experience possible!